Terminal Options
The terminals found in this screen are added to that list automatically (along with the POS list) when they connect to the database for the first time.
Navigation to Terminal Options
-
Log into Online Options with the proper permissions
-
Select Options then Terminal Options. The list of terminals display.
Note: If you have many terminals, use the Search field if you know that name of it. Also, these terminal display here after they are added during setup. You cannont add a terminal here at this screen.
-
Double-click the terminal you want to setup or edit. The Terminal Options displays to the right. The page is long; you'll need to scroll down to find the following options:
Terminal Approval
To learn how to approve a terminal, click here>>
Quicksale Button Profile
-
Select the profile for this terminal, from the Profile drop-down.

-
To learn how to create a Quick Sale button profile, click here>>
-
For an overview on how to set up a Quick Sale buttons, click here>>
Hardware & Receipt Default
After navigating to Terminal Options and selecting the desired terminal, do the following:

-
In the Email Receipt Template drop-down field, select the template you want emailed for purchases from this terminal. See Email Manager for more information on setting this up.
-
In the Receipt Printer drop-down, select the printer you want all receipts to go to for printing
-
Select the Cash Drawer checkbox if this terminal has a Cash Drawer that can open.
Sale Type
Sales Type allows waitstaff to select an option which will print out on the ticket sent to the kitchen. This has a couple of practical uses such as determining how an order should be packaged, such as HERE or To-Go orders, and where an order was placed.
-
To setup your default sale type, select it from the Sale Type drop-down field.

-
To learn how to create Sales Type options which populate the above drop-down, go here>>
Payment Methods
To learn how to set up payment methods types that appear in the section below, click here>>

Note: You can also setup up payment type methods in POSExpress; to learn how, click here>>
Credit Card CCM v3.6
A support agent will fill out this section if need be:

Note: This is our legacy credit card module that will soon be replaced by CCMv4 which makes provisions for the new ProphetPay credit card.
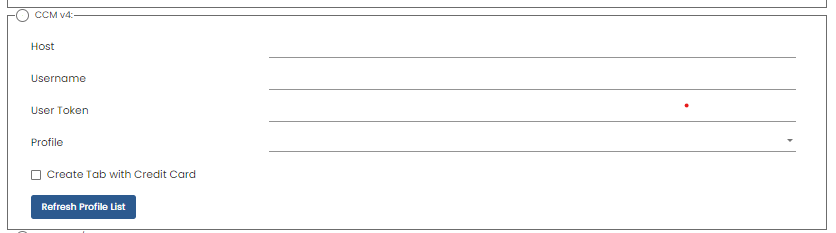
CCM v4
Our new credit card module that will replace CCM v3.6 makes provisions for the new ProphetPay credit card system.
A support agent will fill out this section if need be:
eConduit / IBX
A support agent will fill out this section if need be:
Note: This credit card module is currently being sunsetted. See this release note for more information.

Moneris Cloud
Moneris is our Canadian credit card module option.
A support agent will fill out this section if need be:

Tip Options
-
In the Tip Options section, select the Accept Tips checkbox to enable tips when using credit cards.
-
To offer buttons for customers to use to apply a quick tip, enter up to three different choices in the Quick Tips % Buttons fields as desired.

Note: Remember to select Save in the bottom right corner to save your changes.
Gratuity Options
In the Gratuity Options, you can do the following:

-
Auto Gratuity - Select to automatically add gratuity to a bill then enter or select the percentage amount in the Default Auto Gratuity % ___ field to the right.
-
Apply Gratuity Before Discount - Select to add the gratuity before a discount is applied.
-
Auto Apply Gratuity when customer count >___ - Select this to automatically apply the gratuity when the customer count reaches above what you enter in the field to the right.
-
Enable Admin Fee - Select this if you want to add an admin fee which is set in Sales Type of the Reference Table in Options. See the subtopic To set up for the fees and service charge in Sale Type for more information.
Note: Remember to select Save in the bottom right corner to save your changes.
Related Topics
How to add and customize your auto gratuity and admin fees using the Sales Type option, click here>>
Misc

-
Signature for Member Charge - Select this if you want your member to sign for charges that goes on their account.
-
Default to A Cash Account - Select this if you want the Sales screen to be ready to take cash or a non-member or customer.
-
Manager Check In approval Required - Select this if you want a manager or someone with the proper PIN to check in items from your Bev Cart. (See Bev Cart topic, here>>)
-
Show line items with tax inclusive price - Select this to show price of an item with the tax already added into the price.
-
Use auto seat - Select this for the F&B module to assign a seat number automatically.
-
Auto logoff after___seconds - Select this and enter the desired number of seconds to log an employee off an iPad after so many seconds of not using it.
Note: Remember to select Save in the bottom right corner to save your changes.