Finance Charges in Private Billing
Overview of finance charges in Private Billing
The following topics are covered for running finance charges in Private Billing module and how to set up and run a billing cycle:
Setting up for finance charges
There is an option to charge a finance charge based on the number of days past due. You can enable the option by doing the following:
-
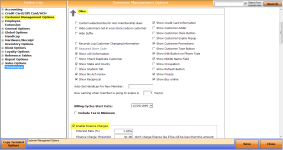
Go to Tools | Options| Customer Management Options. The Customer Management Options screen displays.
-
Select the Other drop-down.
-
You may have to scroll down, then select the Enable Finance Charges checkbox.
-
Set an interest rate percentage, finance charge threshold, and the number of days past due that the finance charge will come into effect in the respective fields.
Note: The threshold is the amount of the actual finance charge, not the balance of the account that is past due.
-
Click Save in the lower right corner of the screen.
How to run the billing cycle with finance charges
-
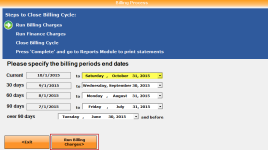
Select the ending date of the period. Make sure you use a date in the past or you will be prompted about it when you run the billing charges in step 3 below.
Note: The first time you run billing, you will need to run the billing cycle for the prior period end date to set up the “buckets” or billing periods. When running this billing cycle, no items should be charged.
-
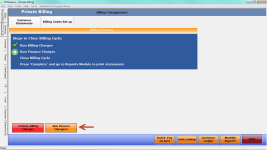
Click Run Billing Charges. You may be prompted to run your monthly recurring charges now; click Yes; skip to the Recurring Charges section.
Note: At the top, when the Run Billing Charges step completes, a green checkmark appears. A white arrow in a green circle will tell you what step you are currently on.
All dues, food minimums, food minimum credits, and assessments are listed that were charged for the billing period you selected in the prior step.
Note: If there are any discrepancies or issues, you have the ability to delete all billing charges by clicking the Delete Billing Charges button in the bottom left-hand corner.
-
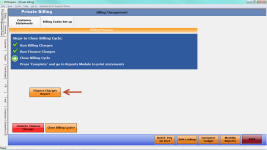
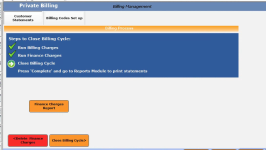
To continue to the next step, simply click the Close Billing Cycle. This will lock down the system and will not allow changes to be made, backdated sales, delete sales, etc.
Note: This is now our “Hard Close” within the Club Prophet software. Any changes or adjustments that need to be completed without reopening or deleting out the billing cycle, will need to be completed in the next billing cycle.
Note: Generating statements is when the system creates the monthly “buckets” for aging.
-
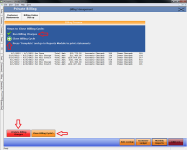
If you enabled finance charges (see Setting up for Finance Charges above), you are now prompted to run that. Click the Run Finance Charges> button. Skip to step 7 below if you aren’t charging finance fees. If you want to exempt a customer of finance charges, see the section on exempting a customer of finance charges below.
After you click the Run Finance Charges> button, the Finance Charges Report button displays and gives you the option to display or print the Finance Charges report.
-
Select the Finance Charges Report button to verify the accounts that have an outstanding balance. You can also check that the accounts are receiving a finance charge that you set up. (See the Setting up for Finance Charge topic above). The Finance Charge Report displays.
Note: You can export the report in many formats from which you can then print.
-
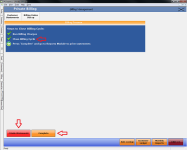
Select the Complete button to finalize the billing process.
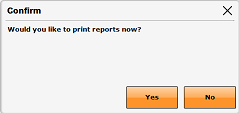
You will now have the ability to print reports now.
Note: To undo the statements just generated, select the <Undo Statements button.
To print the reports for the billing cycle
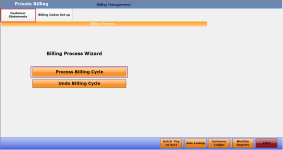
Note: The following steps are a continuation of the previous steps. If you select No, you will be back at the main Billing Process Wizard page. You can come back and run the reports by opening up the Report module, selecting the Monthy button, and running the reports listed. Also, on this screen, you find the last time the Billing Process Wizard was completed. It will also give you the ability to undo the last billing cycle by using the Undo Billing Cycle button.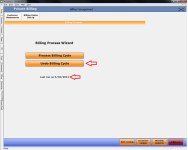
-
Select Yes. The Reports module opens and takes you directly to the Monthly tab with the Customer Report and Statement reports listed and available to run.
-
Select the desired report from the list.
-
Select Display or Print to see and/or print the report out.
To run a billing cycle exempting a customer of finance charges
In some cases, you may want to mark a customer account with the Finance Charge Exempt option by doing the following:
-
Open the Customer module.
-
Search and select the customer account.
-
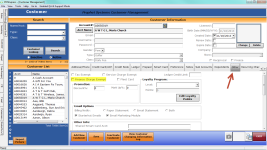
Click the Options tab.
-
Select the Finance Charge Exempt checkbox:
-
Select Save and Exit. Next time you run the billing cycle, this customer will not have the finance charges applied to their account.
