Private Billing Module
Overview
The following topics are covered for the Private Billing module and how to set up and run a billing cycle:
Setting up to post by Statement Display Options
When using the Private Billing module, you need to set up to post by Statement Display Option, in Options as follows:
-
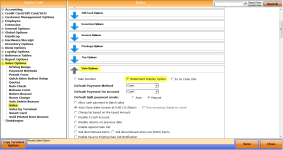
Go to Tools | Option | Sales Option | Sales | Sales Options. The Sales screen displays.
-
Select the Statement Display Option radio button.
-
Scroll down to select the Use Location Code checkbox if you are using the Statement Display Option of Location. (See step 7 below.)
-
Select the Save button in the lower right corner of the screen.
-
Navigate to Sale Category by going to Tools | Options | Reference Tables | Sale Category. The Manage Sales Category screen displays.
-
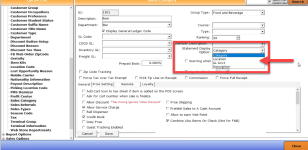
To identify which of the four options you would like to post for each of your categories, double-click a category from this list or click Add to start a new category. The Sales Category screen displays.
-
Select the Statement Displays Option drop-down list and then select one of the following based on how you would like to post: Category, Location, GL Acct, or Description.
-
Category – displays the sales category description.
-
Location – displays the location description of the terminal on which the sale was completed. If you select this, you must set the location codes and terminal here:
-
If you did not select Location Codes in step 3 above, go to Tools | Option | Reference Tables | Location Codes to do so now.
-
Go to Tools | Options | Reference Tables | Terminal Information then double-click the desired terminal, then from the Location drop-down, select the location of this terminal. Scroll down and click Save in the bottom-middle of this screen.
-
GL Acct – displays the GL Acct Description. Note: GL Acct Description does not need to match the description in the accounting package used by the club.
-
Description – displays the description of the inventory item; this is similar to the Customer Statement w/Details report.
Each sales category can be different. For example, Carts can use Category, Sandwiches can use Location, and Beer can use GL Acct.
-
Create Sales Categories for Minimums, Dues, Assessments, etc.
-
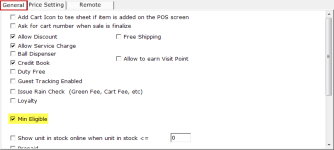
While still in the Sales Category screen, set the sales categories that are calculated for food minimums as Min Eligible by scrolling down to the General tab, and selecting the Min Eligible checkbox.
-
Create inventory items to be used – Food Minimums, Food Minimums Credit, Dues, Assessments, etc. All items should have a retail price of $0.00.
-
Select Save.
Enable Private Club Billing
You will also need to enable the Private Club Billing option by doing the following:
-
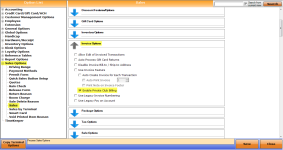
Go to Tools | Options | Sales Options | Sales | Invoice Options.
-
Select the Enable Private Club Billing checkbox about midway on the screen.
-
Click Save in the lower right corner of the screen and then Close.
Setting up billing cycles
-
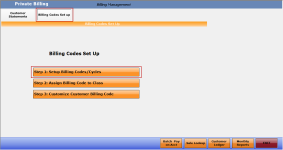
Open the Private Billing module and select the Billing Codes Set up button towards the top-left of the screen.
-
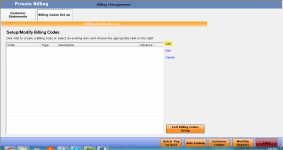
Select the Step 1: Setup Billing Codes/Cycles button. The Setup/Modify Billing Codes screen displays.
-
Click Add to create a new billing code. Note: You can also edit or delete an existing billing code.
-
Populate the Billing Code field.
-
Populate the Billing Description field.
-
Select the correct Billing Type from the drop-down list.
-
Select the Effective Date of this billing cycle.
-
Select the Item that you set up in the Inventory module by starting to type the description or the code of the item. A drop-down displays with matches of what you start to type. Click the needed item from that list and it populates the field.
-
Select either the Monthly or Yearly radio button to set up the schedule of the billing cycle.
-
Enter the Amount to the right of those radio buttons. This will be the amount per charge. There is no need to use a $ symbol.
For example, if the members get charged $25 per billing period, you will enter 25.
-
In the Start Day section, Select either 1st of the month (uses 1) or middle of the month (uses 16).
-
Click the Add the monthly intervals. The table to the right automatically populates the table with monthly dates.
-
To create billing cycles other than a standard monthly cycle (quarterly, annual, etc.), use the Manual Setup screen to the right.
-
Click the Save Billing Code button up towards the right-corner.
-
Select Exit.
To assign billing codes
-
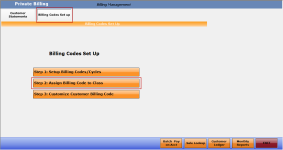
Go to the Private Billing module and select Billing Codes Setup.
-
Select Step 2: Assign Billing Code to Class. The Accounting/Customer Class screen displays.
-
Double-click a customer class from the list. The Accounting screen displays.
-
Scroll down to the bottom of the screen and select the appropriate billing code from the drop-down and select Add. The code displays in the grid above
Note: You must apply the corresponding Food Minimum Credit when you apply a Food Minimum. To learn more about Monthly Food Minimum deductions, jump here>>

-
Click Close in the lower right corner. The Billing Codes Setup screen displays again.
-
Select Step 3: Customize Customer Billing Code to set up Billing Codes by customer. The Customer screen displays.
-
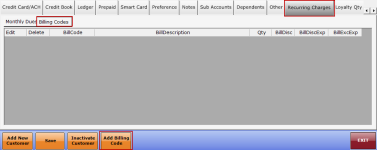
Lookup and pull in a customer then select the Recurring Charges tab.
-
Select the Billing Code tab.
-
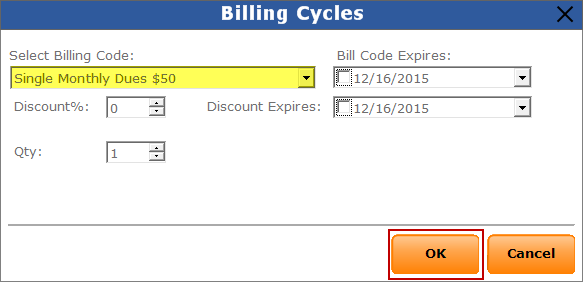
Click the Add Recurring Charge button below. The Billing Cycle screen displays.
-
From the Select Billing Codes drop-down select the desired billing code.
-
Make and other changes in this screen as needed.
-
Click OK.
How to run billing cycles
-
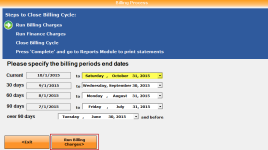
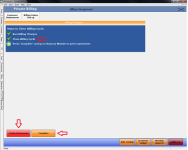
Select the ending date of the period. Make sure you use a date in the past or you will be prompted about it when you run the billing charges in step 3 below.
Note: The first time you run billing, you will need to run the billing cycle for the prior period end date to set up the “buckets” or billing periods. When running this billing cycle, no items should be charged.
-
Click Run Billing Charges. You may be prompted to run your monthly recurring charges now; click Yes.
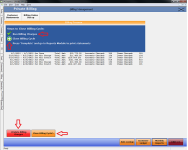
Note: At the top, when the Run Billing Charges step completes, a green checkmark appears. A white arrow in a green circle will tell you what step you are currently on.
All dues, food minimums, food minimum credits, and assessments are listed that were charged for the billing period you selected in the prior step.
Note: If there are any discrepancies or issues, you have the ability to delete all billing charges by clicking the Delete Billing Charges button in the bottom left-hand corner.
-
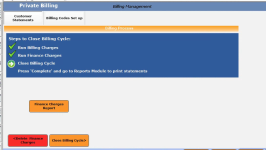
To continue to the next step, simply click the Close Billing Cycle. This will lock down the system and will not allow changes to be made, backdated sales, delete sales, etc.
Note: This is now our “Hard Close” within our software. Any changes or adjustments that need to be completed without reopening or deleting out the billing cycle, will need to be completed in the next billing cycle.
Note 1: Generating statements is when the system creates the monthly “buckets” for aging.
Note 2: If you enabled finance charges, you are now prompted to run that. Click the Run Finance Charges> button. See Finance Charges in Private Club Billing for detailed directions
-
Click the Close Billing Cycle button.
-
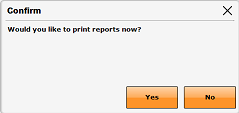
Select the Complete button to finalize the billing process. The print prompt displays giving you the option to print the reports now.
Note: To undo the statements just generated, select the <Undo Statements button.
To print the reports for the billing cycle
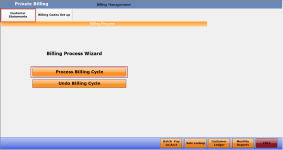
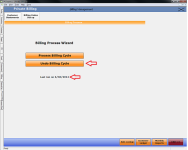
Note: The following steps are a continuation of the previous steps. If you select No, you will be back on the main Billing Process Wizard page. You can come back and run the reports by opening up the Report module, selecting the Monthy button, and running the reports listed. Also, on this screen, you find the last time the Billing Process Wizard was completed. It will also give you the ability to undo the last billing cycle by using the Undo Billing Cycle button.
-
From the previous step when prompted after closing the billing cycle process, select Yes. The Reports module opens and takes you directly to the Monthly tab with the Customer Report and Statement reports listed and available to run.
-
Select the desired report from the list.
-
Select Display or Print to see and/or print the report out.
Related Topics
-
To learn how to run the billing cycle when charging a customer finance charges, click here>>
-
To learn how to run a billing cycle, when charging a flat late fee, click here>
-
Monthly food minimum deductions, jump here>>
-
To learn how to edit certain transactions before a closed billing period, jump here>>
