How to add and customize your auto gratuity and admin fees using the Sales Type option
Overview
You can add and customize your auto gratuity and admin fee as unique line items on the sales screen and receipt using an admin fee and service charge products in Inventory and setting up for that in Options.
This will allow the receipts to list:
-
Itemized receipt
-
Subtotal
-
% gratuity
-
% admin fee
-
% state sales tax
-
Grand total
Quick steps overview
-
Add the inventory item to the sales type for the service and administrative charges.
-
Sell the item using the Sales Type containing these new additional changes.
To create a new inventory for the service charge
-
Go to Inventory.
-
Click New Product to add a new charge item, for example, ADMINCHARGE.
Note: Make sure Track Inventory is set to No.

-
Select Admin Charge from the Item Type drop-down field.
-
Select Save below.
-
Next, repeat steps 2-4 above to add the service charge, for example, Service Charge (Taxable), except select Service Charge from the Item Type drop-down field.
Note: Both the Admin Charge and the Service Charge are hardcoded into the software.
-
Select Save at the bottom of the screen.
Note: Neither one of these charges needs a Retail Price since the charge is pulled from the Auto Gratuity set in the next section.
To set Auto Gratuity
-
Go to Tools | Options | Reference Tables | Gratuity. The Manage Auto Gratuity screen displays to the right.

-
Select the Enable Admin Fee checkbox.
-
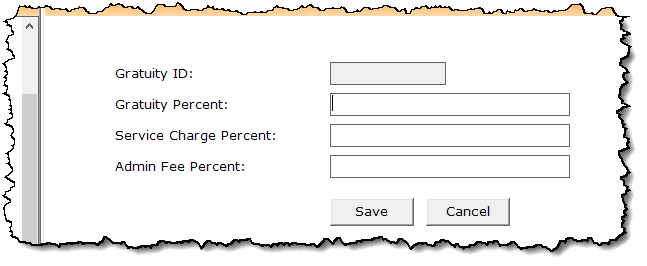
Click Add. The Gratuity screen displays.
-
Enter the desired numbers as follows keeping in mind this hardcoded formula: Service Charge Percent field + Admin Fee Percent = (totals to be) the Gratuity Percent field.
-
Skip the Gratuity Percent field because it will be filled in based on the totals of the next two fields.
-
A percentage for the Service Charge Percent field.
-
A percentage for the Admin Fee Percent field. The Gratuity Percent field displays the total of the Service Charge and the Admin Fee Percent fields
-
Click Save.
-
Select the Enable Auto Gratuity checkbox.
-
Select the gratuity you want to default to from the Default Auto Gratuity drop-down.
-
If you want to apply this gratuity for a certain amount of customers, enter that number in the Auto Apply Gratuity when Customer Count is => field.
-
Check the Apply gratuity before discount box if desired.
-
Select the Save button in the lower right corner of the screen.
To set up for the fees and service charge in Sale Type
-
Go to Tools | Options [or press F2] if need be.
-
Select Reference Table | Sales Types. The Sales Type screen displays to the right.
-
Create a new Sales Type [See the help topic: To set up the Sales Type in CPS] or double-click one listed in the Sales Type table to edit it. The Edit Sales Type screen displays.
-
Select the Service Charge/Gratuity by Sale Type checkbox to trigger the Admin fees and Service charge in the next two steps.
-
In the Select Service Charge/Gratuity by Sale Type section, enter the inventory item exactly as the product code was set up in Inventory that you created into the Product Code field (see the above steps for help).
-
In the Select Admin Charge/Gratuity by Sale Type section, enter the into Product Code field, the product code.
Note: The percentages for the above are set in the Options | Reference Table | Gratuity. See step 4 above in the section above: To set Auto Gratuity.
-
Select Update at the bottom of this screen.
-
Select Save in the lower-right corner of the screen.
Note: To make sure your Sales Type button is visible on the Sales screen, go here in Tools | Options [F2]: Sales Options | Sales | Buttons Visible Options | Show Sales Type near the bottom of this section. Then select Save and Close.
BEST PRACTICE: You should immediately close the software and login again for the changes to take place.
To sell the item using the Sales Type containing the additional changes
-
Go to Sales.
-
Look up the products and add them to your sale.
-
At the bottom of the screen, select the Sale Type button. The label changes. If there is more than one Sale Type, continue to click the Sale Type button until you see the button labeled as the one you need to be able to charge the extra service charges. The extra charges will be listed in the sale.


Example of a printed receipt
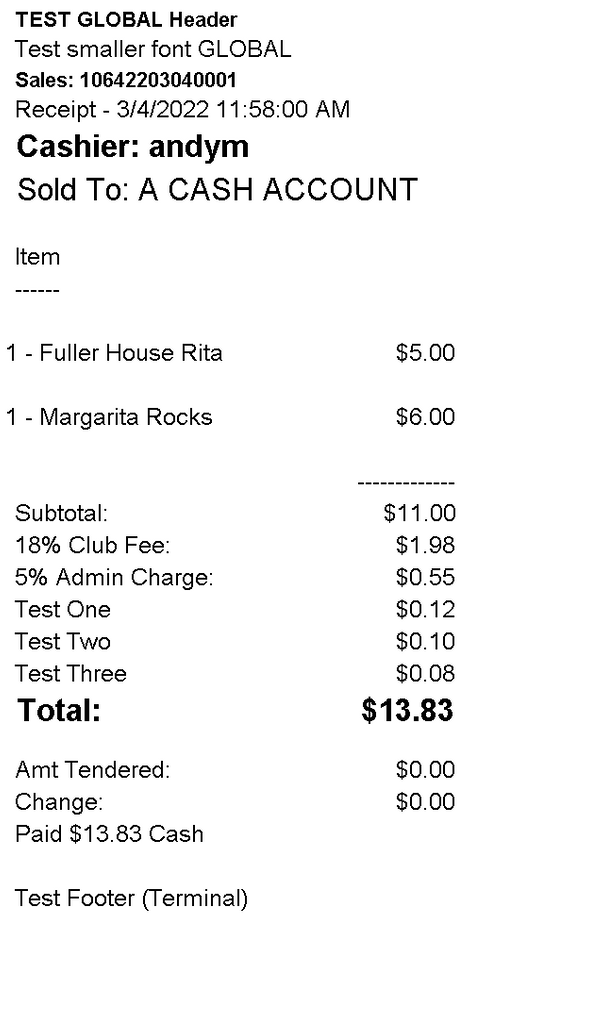
For a printed version of this topic, click here>>