Inventory Module Overview
TABLE OF CONTENTS
Linking a Modifier to an Inventory Item
Using the Modifiers During a Sales Transaction
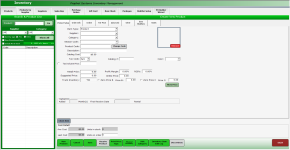
The tabs of the Inventory screen
Several tabs help to organize all of the functions available within the Inventory module. The Product tab will allow you to add a new product or new inventory item, and you will find other helpful functions under the Rain Checks tab, Gift Card tab, and Packages tab. In addition to the Product tab, some of the commonly used tabs in the inventory module are listed below. Remember to always select the Save button in order to keep any additions or changes you make under these tabs.
Purchase Orders Tab
- The purchase order (PO) provides a paper trail for ordered products. By using the PO in the inventory module, you will be able to order products in bulk and use the system to update the inventory and track its supply.
- To create a PO, enter a supplier, product, and quantity, and then select the Place Order button at the bottom of the screen. You will receive the option to print a record of the order.
- When you receive the order, set the status of the PO as a Closed PO by opening the PO and selecting the Received Complete Order option (or Received Partial Order option).
- Once entered, the inventory data will update. You can look up the product to confirm the quantity in stock.
Rain Checks Tab
- This tab allows you to credit customers for the remaining holes of their golf round, if the weather interrupts a game. All rain checks are stored under the inventory module's Rain Checks tab and can be searched for using the filter.
- Under the Rain Checks tab, enter information for the following fields: Product Code, Issue To, Amount, Issue Date, Expired Date, Discontinue check box.
- To redeem a rain check, ring up the customer for a green fee, and then scan the rain check (or enter its Product Code) as if you were scanning a product. The transaction will credit the sale with the rain check amount.
Gift Card Tab
- This tab allows you to add a gift card in your inventory. Gift cards are searchable. You will enter information for the following fields: Card Number, Holder Name, Initialized Balance, Current Balance, Last Updated Date, Expired Date (can be set to "Never").
- The Reset Gift Card button allows you to clear a gift card (zero out) while keeping the Card Number on file so that it could be reused, if desired. The gift card balance will be zero.
- The Disable Card button allows you to temporarily put a gift card on hold, which is useful in case a gift card is lost or stolen). You will temporarily disable the gift card, and you may re-enable it by searching under the Gift Card List in the Discontinued Cards status. Unlike the Reset Gift Card button, the balance will remain on the disabled card.
Packages Tab
- The Packages tab gives you the ability to group items and offer them together for a discount. A Package Code is similar to a Product Code except that multiple items ring up at once.
- To create a package, enter the Package Code, Package Name, and Description information, and then go to the Package Items tab and enter the items included in the package deal based on item code. Enter the special price at which each item will be offered as part of the package. Use the Add Item button to add new and different information to the package.
- To edit a package, you must select an item and hit the Remove Item button for items you no longer want in the package, or else use the Update Package Price button to change the price.
For more details on creating a package in Inventory, click here>>
