Using the Add, No, and Side modifier buttons in CPS Air
Your F&B modifiers were created to be used with these buttons to accompany them.
When adding items to a customer’s tab using CPS Air, you can enable the following modifier buttons when they are set up:
-
An Add button
-
A No button
-
A Side button
Note: The Keyboard button is also a modifier button; you can use it to enter a modifier via the keypad.
Tip: Set up the modifiers and use the buttons as instructed for the best results; it is easy to get lost when not following the prescribed instructions and methods.
If this item has modifier items to add or remove or add as a side, the buttons are available; the Add No Side and Keyboard buttons function in the following way:
To use the modifier buttons in Air
-
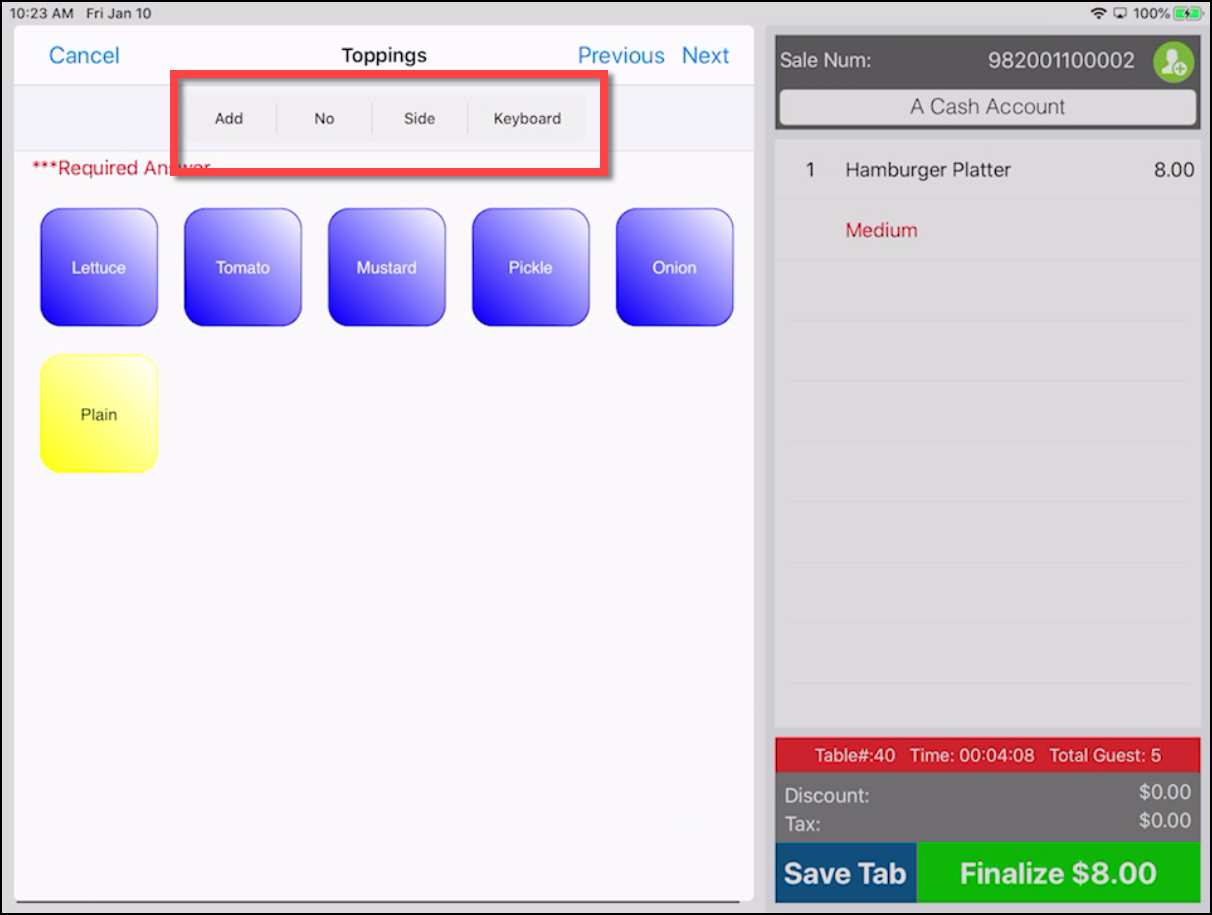
In the Sales screen, after finding an item that has modifiers associated with it, and it is set up to use the modifier with choices, select that item. The main item appears on the right-hand side of the screen, and the modifier buttons *Add, No, Side and Keyboard* display at the top of the screen.
-
Do the following to add the choices assigned to this item, or not add the choices or add the choices on the side:
-
After selecting your main item with modifiers, the items to add display in the middle of the screen (if set up to do so next in order). To add an item, select the item(s) from the middle of the screen. That item has a red number in the upper-right corner of the item button and the word Add displays in front of the item in the order located to the right of the screen.
Note: The Add button would only need to be selected if you selected one of the other modifiers and needed to come back to add an item after that. Also, using the Add button can add one item ONLY.
-
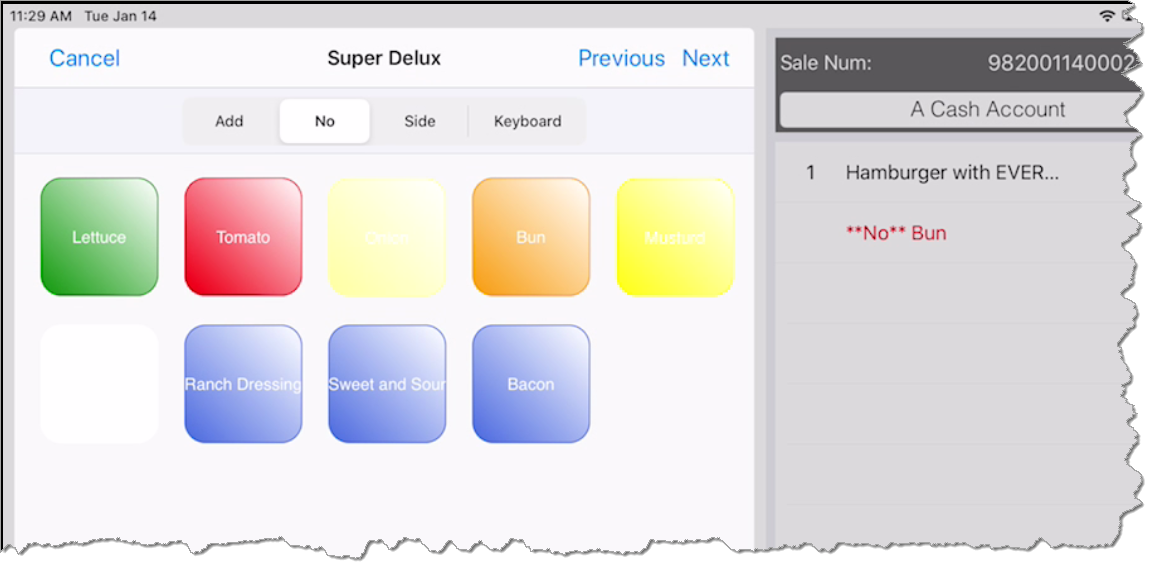
If you need to let the kitchen know that an item cannot be included in this order, select the No button, then select the item on screen. The tab displays the word No next to the item you selected.
Example: The bun for a hamburger has to be set up in the selection of choices for the modifier in order for you to apply the No button to it.
-
If you need to tell the kitchen to include one of the modifier choices on the side, select the item in the middle of the screen, then select the Side button. The tab displays the word Side next to the item you selected.
-
Select the Keyboard button when you want to update a modifier that has already been added or if you want to enter a special message in addition to the modifiers.
Tip: Walk through the screens using the Next button in the top-right as they were set up for the best results. If at any time, you have made a mistake or need to start over, select Cancel from the modifiers and/or Clear Sale and start the order over again, or if you have access to a terminal with CPS, you can remove items there.
-
Select Finish from the top of the screen when done adding the modifiers.
Note: When adding modifiers, you cannot scroll up or down the order if it is long and goes past the bottom of the screen until you are finished adding the modifiers to the tab.
To set up the modifier buttons
Before you use the modifier buttons, you need to set them up in CPS by doing the following:
-
In Inventory, add a new item or search and find an item to add a modifier to.
-
Select Modifier Setup toward the top-right of the screen. The Modifier Details screen displays.
-
Click New Modifier in the bottom-middle of the screen. The screen remains the same.
-
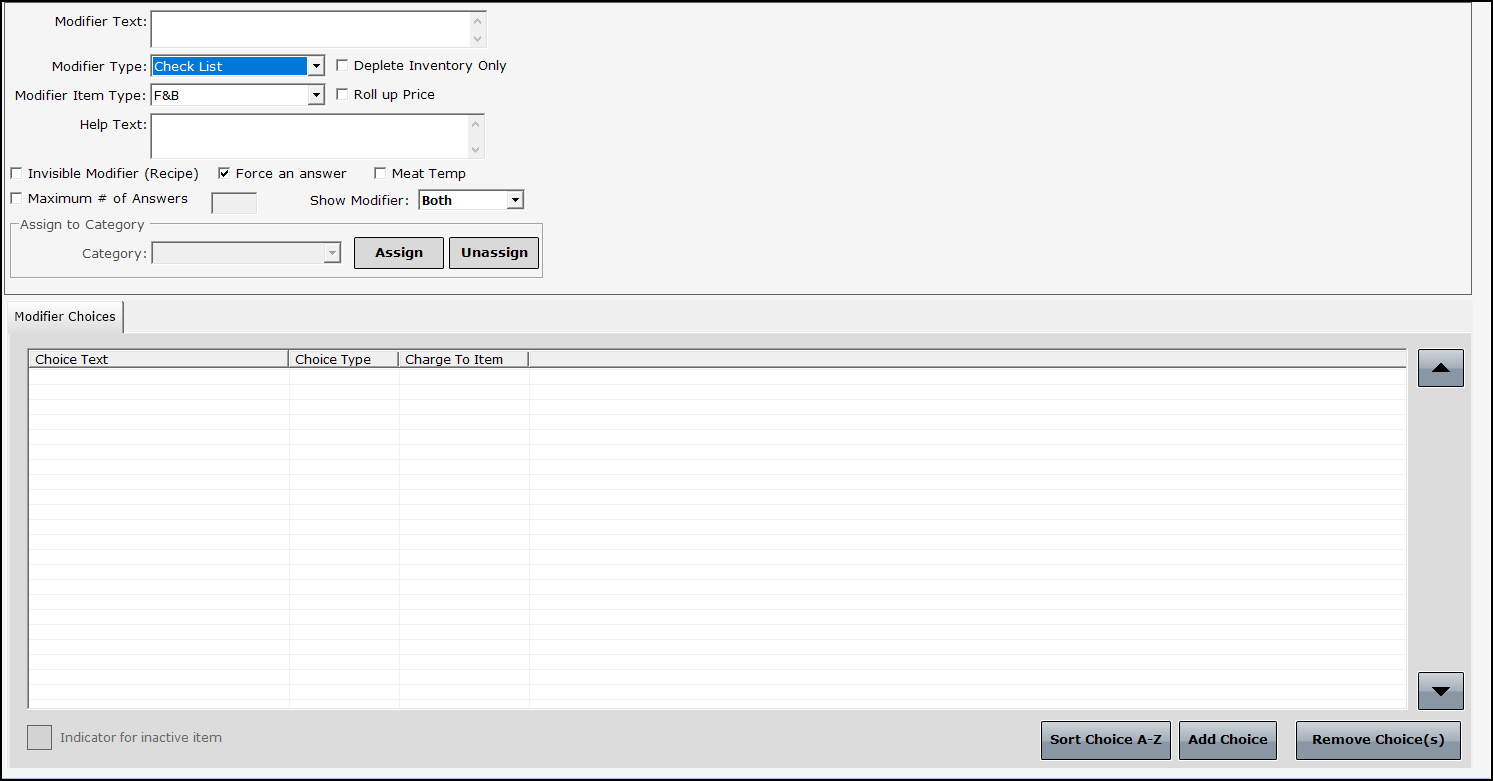
In the Modifier Text box, enter a descriptive name for the types of modifiers that are going to be selections, like super deluxe hamburger toppings.
-
From the Modifier Type drop-down list, select Check List.
Note: Selecting Check List will allow you to add more than one modifier to the item versus using Multiple Choice or any of the other drop-down selections which give you one selection only which does not lend itself to the Add No Side buttons.
-
Make sure that F&B is selected from the Modifier Item Type drop-down list.
-
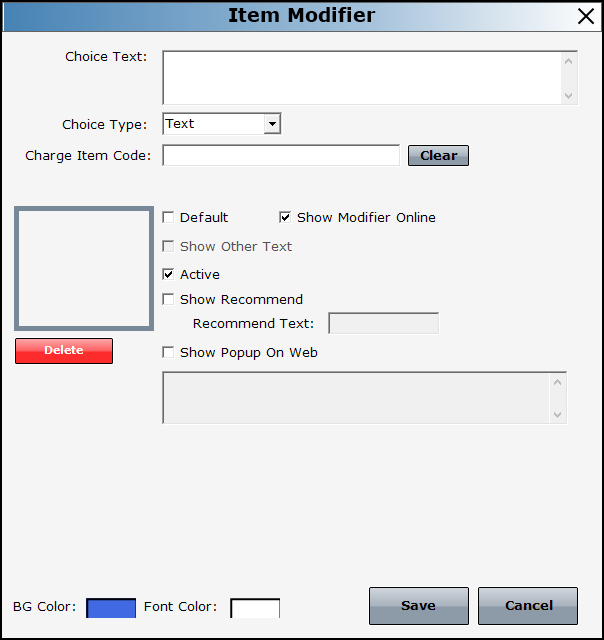
You may have to scroll down to select Add Choice. The Item Modifier dialog displays.
-
In the Choice Text box, type in all the different choices for this item that could and could NOT be wanted with this item. (Think outside the bun, for example, the bun on a hamburger!)
-
In the Choice Type drop-down list, select Text.
-
Check the Show Modifier Online checkbox to have this display online.
-
Make any other changes you need in the dialog box.
-
Select Save.
-
Repeat steps 7-12 to add all the modifiers needed.
-
Click the Products tab and search for the item that will contain the modifiers that you can now assign the new modifier choices to.
-
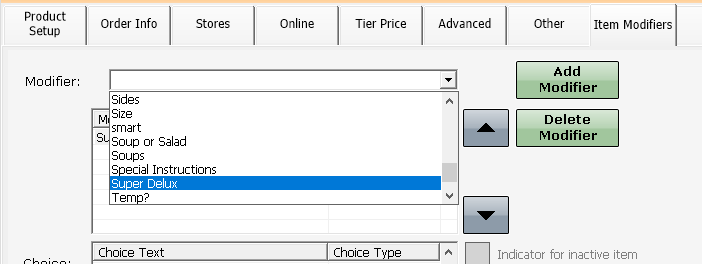
Select the Item Modifiers tab.
-
In the Modifier drop-down list, find and select the modifier that you just added in the previous steps.
-
Click the Add Modifier button. The choices of the modifier that you just added display in the Choice box below.
-
(Optional) Select the Preview button to see what it will look like when taking the order and using the modifiers.
-
Click Save then Exit. The new modifiers are available immediately in Air.