Splitting a check in version 3.94 using Air
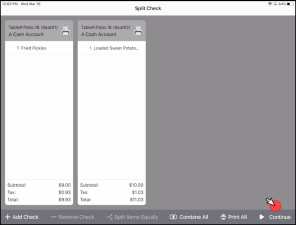
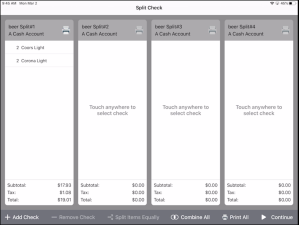
Using Air 3.94, in the Split Check screen of F&B, you have the ability to move items from one guest’s check to another guest’s check. You can add and view four checks on one screen but can work with more than four checks by swiping right to see more checks. To see a video of splitting a check in 3.92, click here.
To quickly start a tab
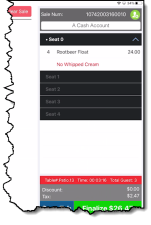
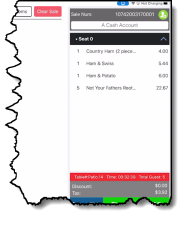
This starts at the point where you have already started a tab for a table and put all the orders under Seat 0, and it now needs to be split.
Note: If you use the floor layout in CPS Air and don't want to bother with seats, just add your items under Seat 0; when you re-access the table, the other seat numbers will be gone.
To split the check from F&B with all items under Seat 0
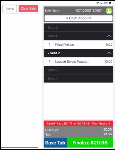
- In F & B, at the table layout screen, select your table (it will be red). The tab displays.
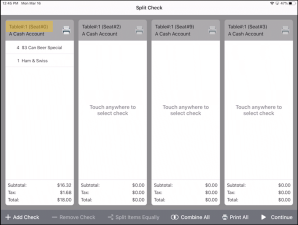
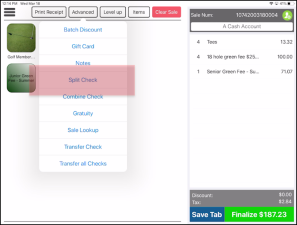
- Select Advanced then Split Check from the drop-down menu. The tab is saved and the Split Check screen displays and the check is located to the left.
- Select +Add CheckThe Add Seat Number box displays.
- Enter the seat number and select Done. Repeat adding as many checks and seat numbers as you need to split the check.
Note: Only four checks will be visible on the screen but you can swipe left to see the ones off-screen. Selecting Remove Check removes the selected check as long as there are no items on it.
- You can split the check in two ways: by the items on the check or by splitting the amount of money equally between all of the checks. Do one of the following based on your needs:
- To move an item to a different check, select that item then select the check.
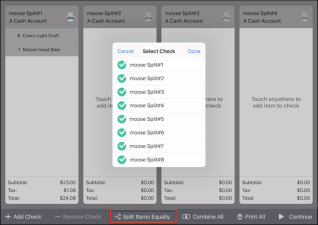
- To split the cash amount equally for the items on a check, select an item or items from the first check, then select Split Items Equally at the bottom of the screen. A pop-up Select Check box displays with the split listed. Select Done. The item(s) selected split between the checks, and the total divided between the number of checks which is shown at the bottom of each check.
Note: To combine all checks, select the Combine All option below. This may be used to start the splitting over again in case you make a mistake.
Note: While splitting checks, you can use the printer icon for a separate check in the Split Check screen if needed.
- Select Continue when you are done. All tabs save and the table layout screen displays.
- Finalize your tab from the Sales screen when the customer is ready to settle.
To split the check if you are using seat numbers
If you are using seat numbers for each of your guests, you add the items under their individual seat number. The check will still need to be split, as follows:
- Select the seat number for the right-side of the screen, and then add the item using the Quick Sale buttons or the Items button.
- Select Advanced then Split Check from the drop-down menu. The tab is saved and the Split Check screen displays with all of the checks split out.
- Select Continue to accept the split as it is displayed. All tabs save.
Note: If you need to split the checks at this screen, follow steps 3 - 6 above.
- Finalize your tab from the Sales screen when the customer is ready to settle.
To split a check from the Sales screen
- From the Sales screen, with the tab displaying to the right of the screen, select the Advanced tab at the top of the screen. A pop-up menu displays.
- Select Split Check. A screen displays
Note: If you have a tab started but not saved, you are prompted to name it at this time or swipe your credit card.
- Select +Add Check at the bottom-left of the screen. A new check displays to the right. Repeat this to add as many checks as you want to use to split the check.
- Do one of the following depending on your needs:
- To move items to another check, tap the item. An [Touch anywhere to add item to check] message displays on each new check added, then select the other check anywhere to move that one item.
Note: If you have not added the new check yet, you can now by selecting +Add Check in the lower-left corner of the screen.
Note: Only one item can be moved at a time. If you have more of the same item, the Number of Split Items number pad displays and you can select how many of that item to move. Select the number of items then select Done.
EXAMPLE: Four hot dogs to four different checks: Tap hot dog, tap the number one, tap the next check; repeat this three more times.
- To split the checks equally, select an item from the first check, then select the Split Equal button at the bottom of the screen. The Select Check screen displays with the split checks.
- Select Get Tab to begin to finalize each payment.
- Finalize payments. When you are done finalizing one split check, the Split Check screen displays again so that you can finalize the next check; select Continue again and repeat the process until all checks are finalized.
