Changing the rain check expiration date
There are times when you need to change the expiration date on a rain check for your customers. Now you can with the 3.96 updates. A button is available to reset the expiry date which unlocks the date field to allow an adjustment.
Shout out: Bob Paley
To update the user rule so as to be able to edit the rain check expiry date
-
In Tools | Options | Security | User Rules from the left-hand side. The User Rules screen displays to the right.
-
Double-click the user who will be given the access to change the rain check’s expiration date.
-
Select the Change Rain Check Expiration checkbox.
-
Click Save in the lower-middle of the User Rules screen.

-
Click Save in the lower-right corner of the screen. Update Completed displays in the lower-left corner of the screen.
-
Select Close. The screen closes.
Note: You can also password protect enabling or disabling rain checks and giving out duplicate rain checks in Tools | Options | Security | Password Protection by entering a password next to the Enable/Disable Rainchecks and Duplicate Raincheck fields respectively.
BEST PRACTICE: You should immediately close the software and login again for the changes to take place.
To change the expiration date of a rain check
-
In Inventory, select the Rain Check tab at the top of the screen.
-
Select the rain check item to the left. The details for this rain check display to the right.
Note: Make sure that an expiration date displays in the Expired Date field. You cannot add a date, only change a date already in that field.
-
Select the Change Expiration button to unlock the date field to the left.
Note: For those who do not have the user rule selected, the button would be grayed out; it will indicate to the user that it is possible to change the expiry date if they have the level of security to do so.
-
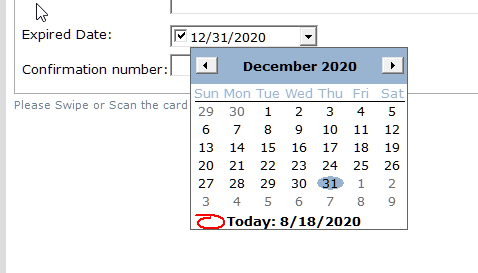
In the Expired Date field, select the date using the drop-down arrow and calendar or enter the new date into the field.
-
Select Save at the bottom-middle of the screen. A prompt displays asking if you are sure you want to make the change.
-
Select Yes.
-
Select Exit. The rain check item now has a new expiry date.