Zero Member Credit Book feature using a store code
When you are using the Zero Member Credit Book option in the Customer Management Options in the Report module, the software now adds a proper store code so that when you run reports on the zero member credit book items, it shows up under the store where the event took place in the 3.96 release.
Shout out to Patrick Renner@wilsongolfgroup.com
The following requires you to be set up with “inventory by store codes” and then have your inventory items assigned to each of your stores. This is done during your initial setup by a Club Prophet support agent. It doesn’t apply to facilities that are not set up by “inventory by store codes.”
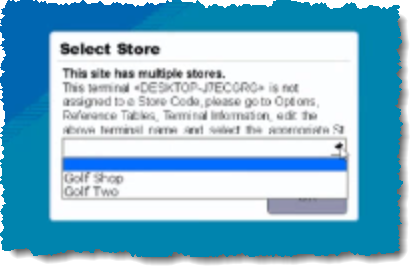
When you first log onto POS Express you will be prompted to select the store that this terminal is assigned to before you proceed:
To Add Credit Book to a customer that is assigned to a store code
-
Go to Tools | Options | Customer Management Options.
-
On the right side, select the Zero Accounts/Batch Manual Adjustments/Archive transactions blue down-arrow. It drops down to show buttons.
-
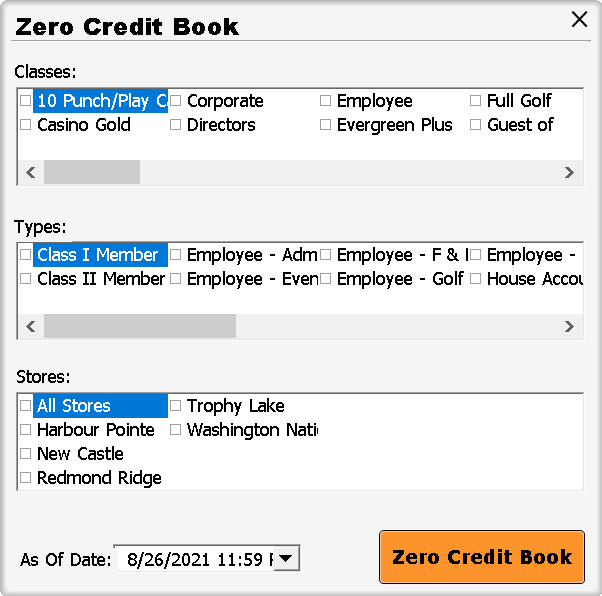
Select the Zero Member Credit Book button. The Zero Credit Book displays.
-
Select the classes from the Classes section, the types from the Types section, and Stores from the store section as needed.
-
Select the date from the As Of Date field.
-
Select the Zero Credit Book button. A confirmation dialog displays.
-
Confirm this. Verify that the zero was assigned to the customer store in the report using the steps below.
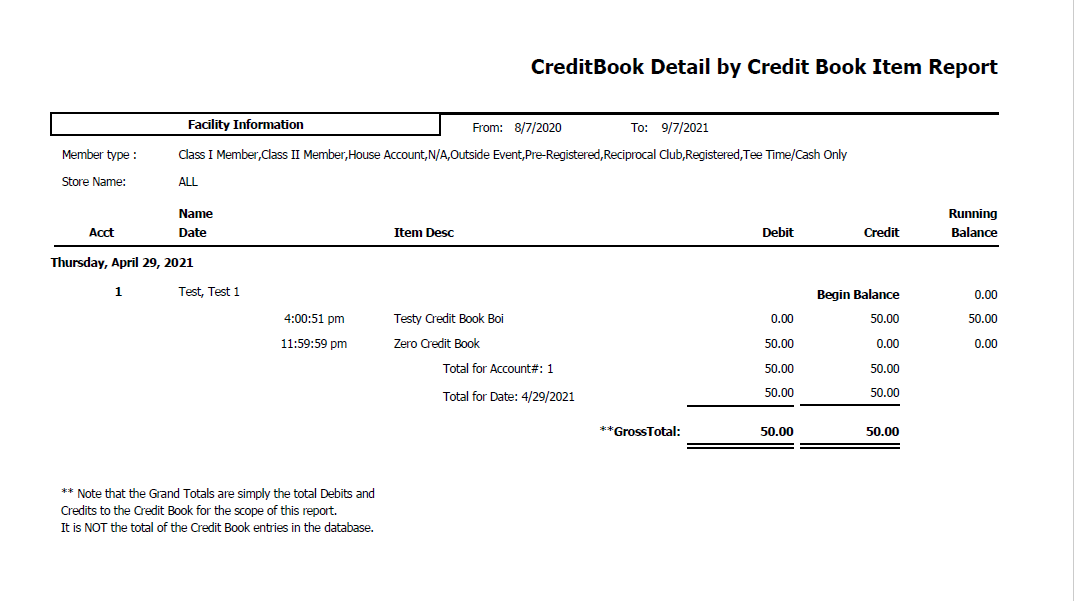
To view the Credit Book Detail by Credit Book Item report
-
Go to Reports.
-
Select the time-frame tab that you assigned the report: [On Demand, Daily, Weekly, Monthly, Yearly] The reports under that tab display.
Note: Have no idea what that means? Are you running this report for the first time? If you answered YES, click here>>
-
Select the Credit Book Detail by Credit Book Item report from the list on the left; you may have to scroll down.
-
On the right-hand side of the screen, select the filters as needed for this report.
-
Select Print or Display. The report is run and the anniversary date is in the report. For more details on this step, jump here>>
Example Report